Home » Without Label » Installing Crown Molding On Kitchen Cabinets / Installing Crown Molding In The Kitchen The Hollow Road : This video teaches you how to install crown molding on cabinets with clever tricks and tips it would take you years to learn on your own.
Installing Crown Molding On Kitchen Cabinets / Installing Crown Molding In The Kitchen The Hollow Road : This video teaches you how to install crown molding on cabinets with clever tricks and tips it would take you years to learn on your own.
Installing Crown Molding On Kitchen Cabinets / Installing Crown Molding In The Kitchen The Hollow Road : This video teaches you how to install crown molding on cabinets with clever tricks and tips it would take you years to learn on your own.. Watch this video and even your first crown molding installation will look neat and professional. Repeat this process with the rest of the cabinets with outside corners. They favor a simple look, and you will not notice any decorative trim or faux finishes. (use one long strip for a row of cabinets the same depth.) then apply wood glue to each strip, nail it in place, and let dry. The difference is crown molding needs the ceiling to support it where cabinet molding doesn't.
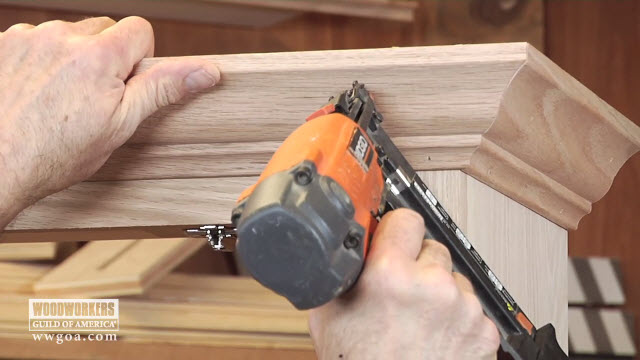
Use a sharp pencil for making all marks. Nail or glue the moulding to the wall and ceiling. Use a pin nailer to nail into the corners of the two pieces of crown molding (image 2). In this video we will go over some tips and tricks that might help whe. Ask this old house general contractor tom silva installs crown molding on kitchen cabinets with full overlay doorssubscribe to this old house:
Installing Crown Moulding The Easy Way Ana White from ana-white.com Installing the crown molding on kitchen cabinets once your supporting nailer strips are installed, the crown molding installation can start. The extra length will help push the cope joint closed when installing crown moulding. Not only do you have to be aware of an inside corner, outside corner, right board, or left board, you also have to magically hold the crown molding up against your miter saw fence at just the right angle or else your corners will never fit together. And one of the trickiest steps in cabinet installation is installing filler strips. Measure the length of the front and sides of your cabinet. Watch this video and even your first crown molding installation will look neat and professional. Using cabinets of varying heights or landscaping as. Installing cabinet crown molding can provide you with a very elegant look for your kitchen.
First, if you've never cut crown molding before, then you will need to make practice cuts.
Crown molding is cut at an angle at the ceiling and wall/cabinet. After that, you will need to file off the front and side stiles of your cabinet. Once the cabinets are bought (or built) and installed your options are limited to the situation you have in front of you. Measure the length of the front and sides of your cabinet. Miter the edge that meets the first strip of crown molding and hold the ends together. Cabinet molding is usually a solid piece of wood with a 90 degree back that goes flat on the cabinet and then perpindicular with your ceiling. Make a square cut on the uncoped end of the crown moulding. By doing this, if a piece is cut wrong you might be able to use another long piece as a backup. They favor a simple look, and you will not notice any decorative trim or faux finishes. Installing the crown molding on kitchen cabinets once your supporting nailer strips are installed, the crown molding installation can start. Mount the crown molding to the cabinet using the brad nailer. Ask this old house general contractor tom silva installs crown molding on kitchen cabinets with full overlay doorssubscribe to this old house: Mark all sides of the cabinet onto which you will be attaching crown moulding.
Measure and mark the front section of crown molding to the cabinet width. If you are installing contemporary kitchen cabinets, then no need to install crown molding. So, not all modern kitchen cabinets have crown molding. The extra length will help push the cope joint closed when installing crown moulding. Nail or glue the moulding to the wall and ceiling.
Crown Molding Installation On Cabinets Wwgoa Woodworkers Guild Of America from d2culxnxbccemt.cloudfront.net The extra length will help push the cope joint closed when installing crown moulding. Cut a mating angle on the next piece of crown, then apply carpenter's glue to end of molding. Watch this video and even your first crown molding installation will look neat and professional. Measure the length of the front and sides of your cabinet. By doing this, if a piece is cut wrong you might be able to use another long piece as a backup. With crown molding it seems like there are 10 considerations to make for every single cut. (use one long strip for a row of cabinets the same depth.) then apply wood glue to each strip, nail it in place, and let dry. Miter the edge that meets the first strip of crown molding and hold the ends together.
Make sure the pieces are together and in place snugly.
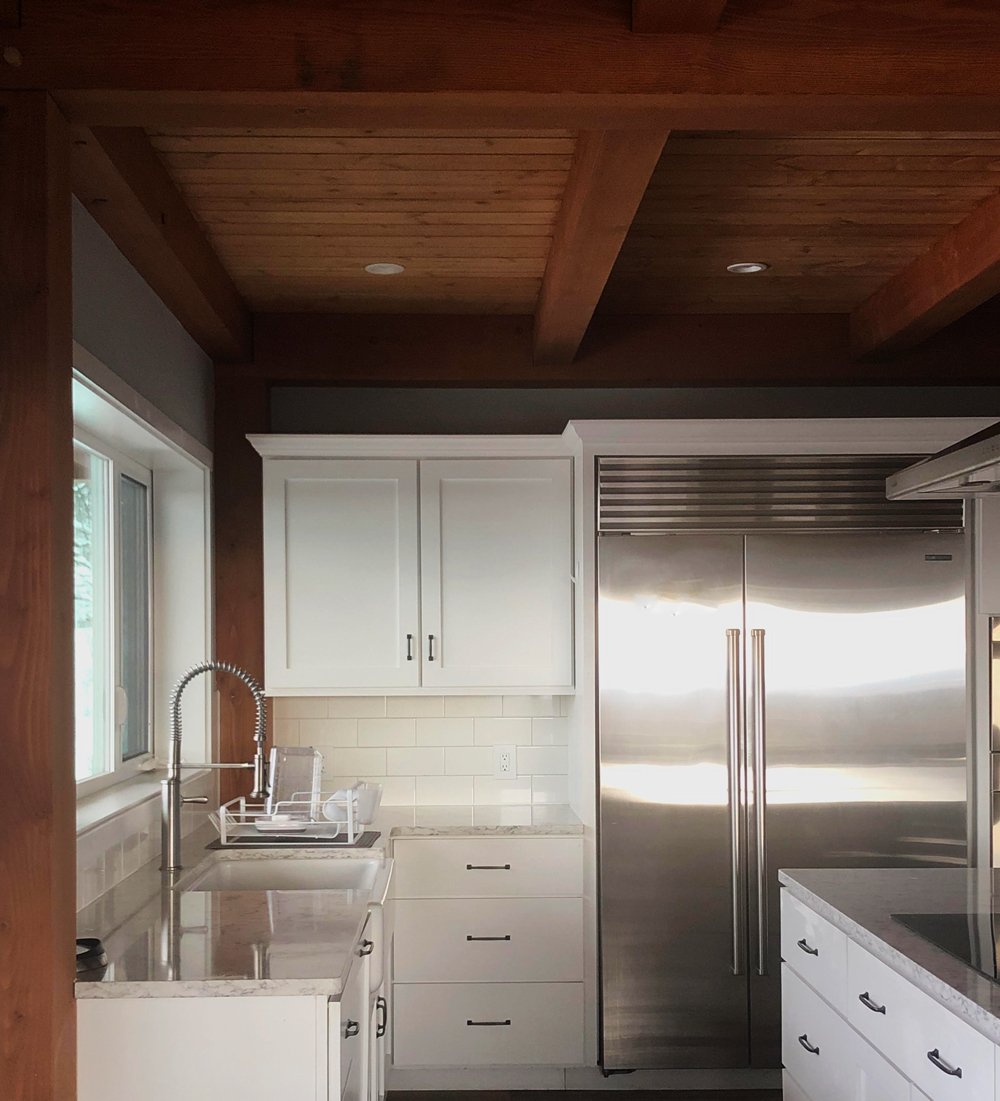
Crown molding that sits atop kitchen cabinets gives them a solid, finished look. By doing this, if a piece is cut wrong you might be able to use another long piece as a backup. Measure and mark the front section of crown molding to the cabinet width. Measure the length of the front and sides of your cabinet. Provide a nailing surface for crown moulding by attaching solid wood mounting strips to the top edges of the cabinets. Flex the moulding in place. Not only do you have to be aware of an inside corner, outside corner, right board, or left board, you also have to magically hold the crown molding up against your miter saw fence at just the right angle or else your corners will never fit together. Use a 25′ or longer, wide rule tape measure to avoid the tape collapsing during measurements. And one of the trickiest steps in cabinet installation is installing filler strips. Then, you will need to prep the baseboards and attach them in place. When installing the top of a cabinet, space the finish nails about 12 to 16 inches apart. The extra length will help push the cope joint closed when installing crown moulding. Hold the second piece of crown tight against the first piece, then nail it to the cabinets.
Make sure the pieces are together and in place snugly. Then, you will need to prep the baseboards and attach them in place. Hold the second piece of crown tight against the first piece, then nail it to the cabinets. With crown molding it seems like there are 10 considerations to make for every single cut. Next, nail the wood structure pieces into place on the cabinets.
How To Hang Crown Molding On Kitchen Cabinets This Old House from cdn.vox-cdn.com First, if you've never cut crown molding before, then you will need to make practice cuts. Secure the crown molding when installing on a wall, use the pneumatic nailer to secure the crown molding at the wall studs. Cabinet molding is usually a solid piece of wood with a 90 degree back that goes flat on the cabinet and then perpindicular with your ceiling. Cut the molding according to the measured length. Crown molding is cut at an angle at the ceiling and wall/cabinet. When installing the top of a cabinet, space the finish nails about 12 to 16 inches apart. Miter the edge that meets the first strip of crown molding and hold the ends together. Mark all sides of the cabinet onto which you will be attaching crown moulding.
Watch this video and even your first crown molding installation will look neat and professional.
After that, you will need to file off the front and side stiles of your cabinet. Measure the length of the front and sides of your cabinet. Using a nail gun, nail the crown to the baseboard. Dry fit the crown molding by holding the front piece and a side piece against the front and side of the baseboard (image 1). Next, nail the wood structure pieces into place on the cabinets. If you are installing contemporary kitchen cabinets, then no need to install crown molding. The extra length will help push the cope joint closed when installing crown moulding. Cut the molding according to the measured length. Then, measure and cut the crown molding to exact size. By doing this, if a piece is cut wrong you might be able to use another long piece as a backup. This video teaches you how to install crown molding on cabinets with clever tricks and tips it would take you years to learn on your own. Ask this old house general contractor tom silva installs crown molding on kitchen cabinets with full overlay doorssubscribe to this old house: Use a pin nailer to nail into the corners of the two pieces of crown molding (image 2).
/cdn.vox-cdn.com/uploads/chorus_asset/file/19889293/crown.jpg)
